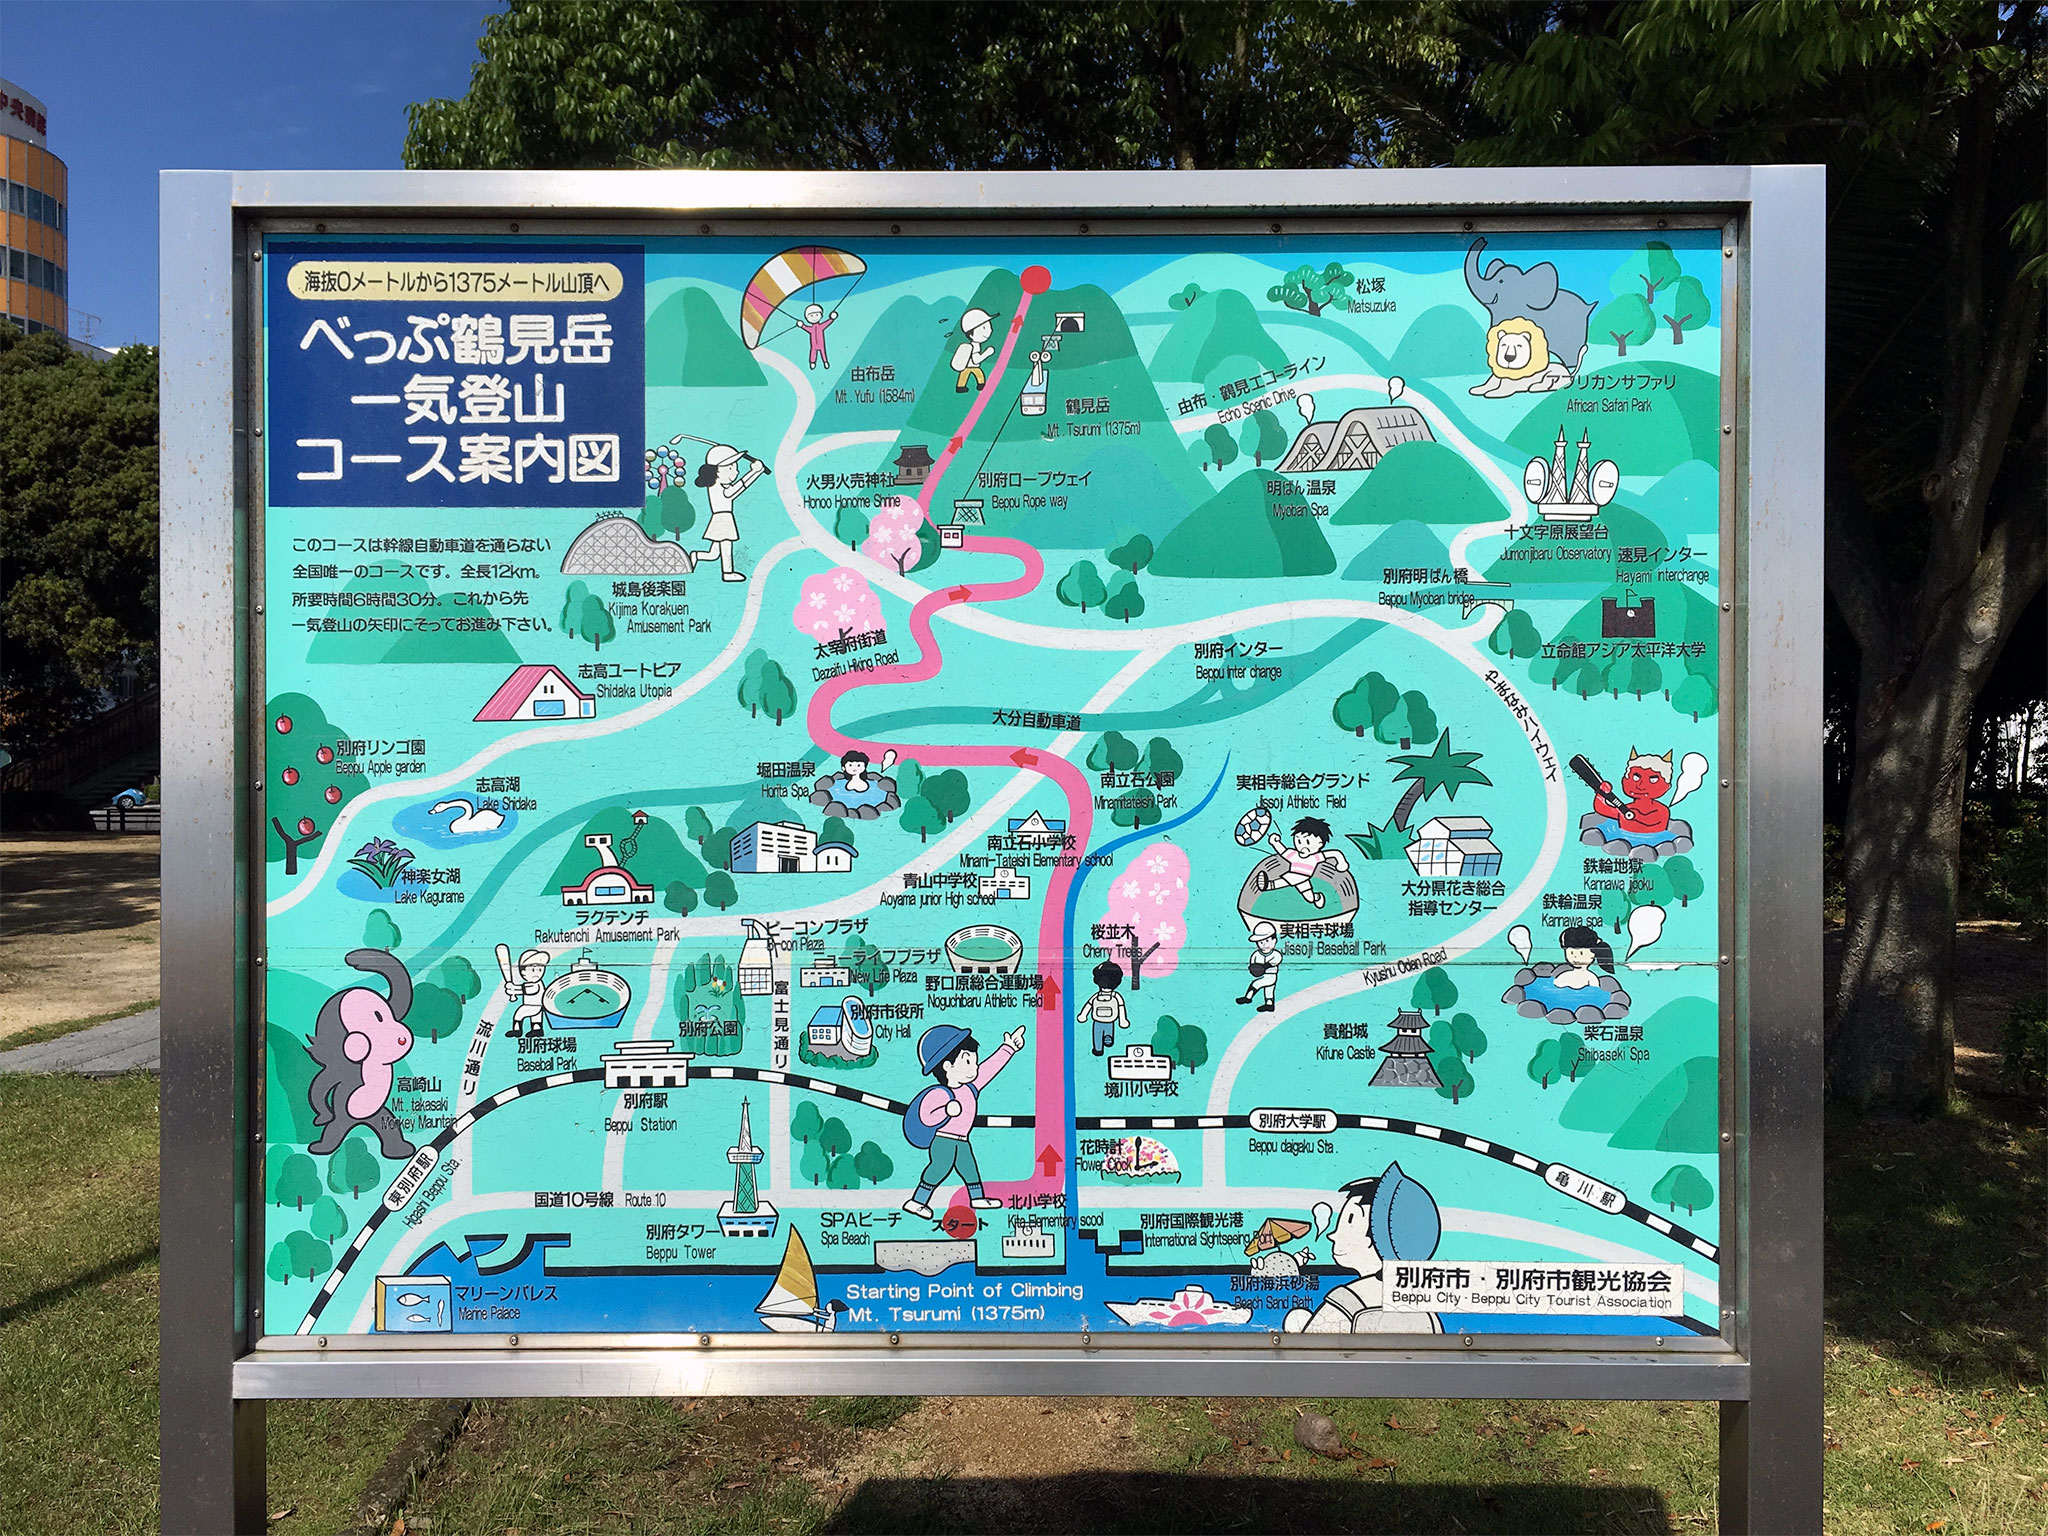
It’s entirely possible to hike to the summit of Mt. Tsurumi (鶴見岳, 1375m) from Beppu (別府市), but for some reason this hike isn’t covered in any online Japan travel guide. If you’ve already read a few of the guides you’ll notice that they’ll explain in detail the bus to the ropeway (別府ロープウェイ), and the ropeway itself, then a quick sentence to say “it can also be hiked from the ropeway” with no additional information making it seem like the hike might be a bit iffy.
This couldn’t be further from the truth. The Beppu City Tourist Association has done an extremely good job of developing and signposting a route that starts in Beppu. And in my opinion, the hike prior to the ropeway is the best part. I honestly feel bad that none of the official guides cover it at all, I can only hope one day they decide to add this information.
From Beppu you can expect to react the summit in about 4 hours. You’ll be hiking from sea level so you’ll be doing the full 1375m. Common sense prevails – take water, appropriate footwear and clothing. The humidity will make you sticky so wear loose clothing.
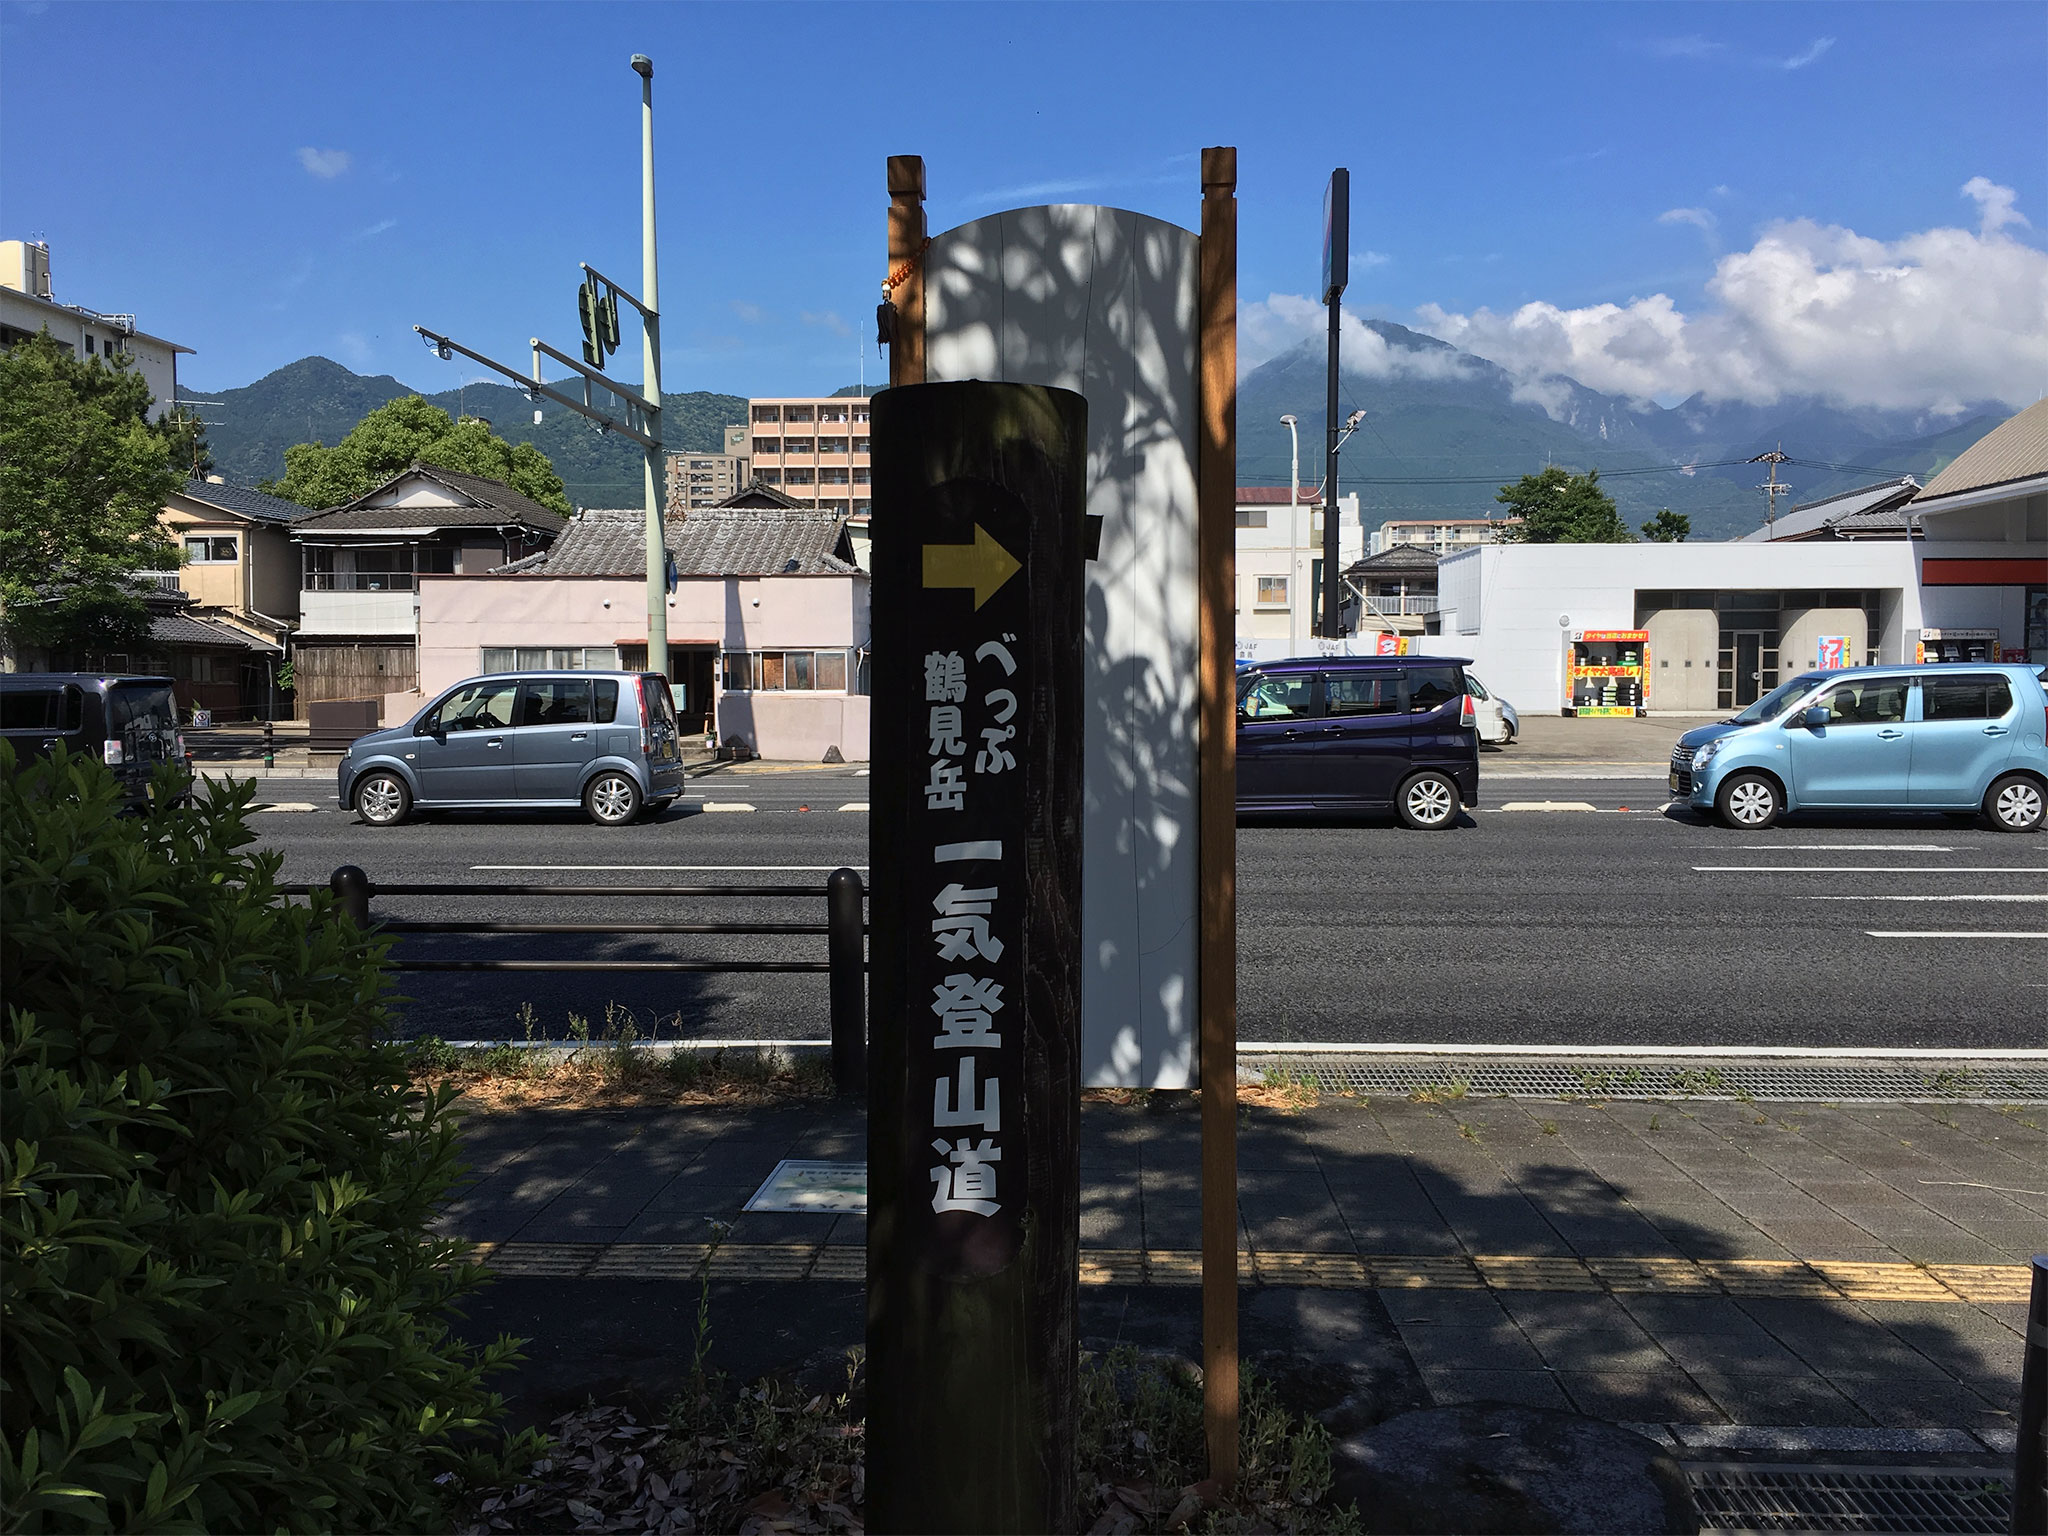
The starting point for the hike is Matogahama Park (的ケ浜公園), approximately 10 minutes walk from Beppu Station. Towards the north of the park you’ll find the following sign, indicating the start of the route.
You’ll also see this sign, and these will pop up every 30 minutes or so. They tell you your current elevation, time/distance to the next checkpoint, time/distance to the ropeway (halfway to goal), and time/distance to the summit (goal).
![]()
Walk north & towards the road and you’ll see the first brown signpost. These will be your guides, and nearly all look the same, so keep on the lookout for them.
Cross the road where possible, and continue walking north for about 5 minutes until you cross a massive river. You can’t miss it. There’s a petrol station on the north side of the river, and you’ll see signs for the Mt. Tsurumi “one-shot” hiking trail, so turn left here and start following the river.

From here you’ll make your way up, crossing back and forth a few times. The riverbed is massive and has been fortified with concrete, which I presume to be an overflow precaution. If you’re a fan of brutalist utilitarian architecture, you’ll love this part.
The important thing to remember is that you should be seeing a brown signpost every 5 minutes or so. If you go 10 minutes without seeing a signpost, you’ve gone the wrong way, so you’ll need to backtrack to find where you went wrong.
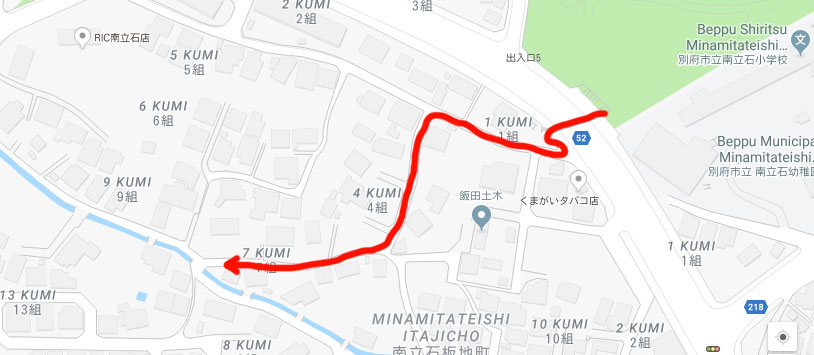
When you get to Minamitateishi Park (南立石公園), you’ll be leaving the river. You’ll enter the park on the north-east, and exit on the south-west. I lost the signs in the park and continued along the river (which was wrong), so just keep an eye out and remember if you haven’t seen a sign in 10 minutes you’ve gone the wrong way.
I also got a little lost after exiting the park. For some reason one of the signs was missing, so here’s what you need to do straight after the park.
After this, you’ll be making your way up through some quaint & quiet Japanese backstreets. This is lovely part of the walk and it would be a shame to miss it. From here the walk is signposted at virtually every road so you can’t really go wrong.
Shortly after crossing over the Oita Expressway (大分自動車道), you’ll come into a lush forest, which is yet another amazing experience making the hike from Beppu worthwhile.
After the forest you’ll pass under Route 11. From here, the signs disappear until the ropeway, and the trail isn’t totally obvious as barely anyone walks it. If you’re a keen observer you should be able to follow it up to the ropeway, but it might be worth having the ropeway pinned on Google Maps just to make sure you’re heading in the right direction (you can do this on WiFi before you leave if you don’t have data).
Once at the ropeway, the signs become clear again as does the trail. If you head into the ropeway to stock up on supplies, you can pick up the trail from the north-west side of the carpark. From here the going gets a bit tougher – you still have another 875m to climb in 4km. I also found this part to be decidedly more humid.
There isn’t really much to say about this part – enjoy the hike and take pit stops at the shrines. You can’t really get lost, the paths are pretty obvious.
When you’re almost at the summit, you’ll come across a fork in the path (it’s indicated with a sign, so you’ll know it when you see it). Take the path on the left.
You’ll be at the summit within 10 minutes. If you’re lucky, you’ll get some nice views. The best view over Beppu isn’t actually from the summit, but from a viewpoint a little below. This is well signposted in English, so as you make your way down from the summit, just follow the signs towards the ropeway.
I would recommend taking the ropeway back down (1000yen) then bus back to Beppu (480yen). The ropeway will give you some great views, just make sure you line up to get on first so you can sit by the window. The bus departs right outside the lower ropeway terminal, and only accepts coins and 1000yen notes, or you can pay using an IC card. And don’t forget that in Japan you board the bus at the back and exit at the front. If paying by cash, you pay when you get off (an honour system of sorts). Or if using IC, you touch on at the back, then touch off at the front.
I hope this helps you on your hike up Mt. Tsurumi. If you have any feedback, please let me know in the comments below.
Comments are closed.
5 comments
Just did this yesterday! Ran most of it, but the grade in the last few kilometers near the summit (around 40%) precludes running. Thanks for your excellent instructions, I had no problems finding the trailhead or following it on the way up. On the way back it’s a little tricky, as you can’t always see the uphill trail markers going down. There are seperate signs for downhill, but they’re more infrequent, and are blue with white text and a yellow arrow indicating the direction of travel.
Thanks a lot for this post!
(Oh, and it might be a good idea to bring toilet paper. The public bathroom at the start didn’t have any, luckily the 7-11 down the road did. There are regular public bathrooms along the way. It’s a long day if you go both ways!)
Glad you enjoyed the run and that the post helped! Cheers for coming back to comment 🍺
At 28th of October I also walked from the park to the top of the mountain. At some point it went wrong (after the second parc). I still made it to the ropeway, but I took the high way… From the top of the mountain, I took the ropeway back and from there the bus to Beppu station. The walk to the ropeway would be nicer if I didn’t get ‘lost’ and had to take the ropeway. Next time! 😉 After all a good day and I hope more people will start from Matogahama Park.
‘and had to take the ropeway’ must me high way
Did the hike today morning. Took me 4.5 hours. Had just rained yesterday, it was heavenly weather. Thanks for this guide!